
How to add end screens to your YouTube videos
How to add end screens to your YouTube videos
- Sign in to your YouTube account.
- In the top right, click your account icon > Creator Studio.
- In the left menu, select Video Manager > Videos.
- For the video, you want to add the end screen to, click Edit.
- In the top tab bar, click the End screen.
- If the selected video contains annotations, follow the instructions to unpublish them. You can re-publish them at any time.
- You’ll see your video with the predefined grid and a timeline below that indicates the available part for the end screen. Click the Add element. You can add up to four elements, and one of them must be a video or playlist.
- Choose how to build your end screen:
- Add element: You can add up to four elements to a video. At least one element must be a video or playlist. Select each element and fill in the required information, then click Create element.
- Copy from the video: You can copy an end screen from another one of your videos and edit the elements.
- YouTube template: You can choose from predefined formats that show combinations of elements. You’ll need to define the content for the elements in the end screen, such as add the channel to be featured.
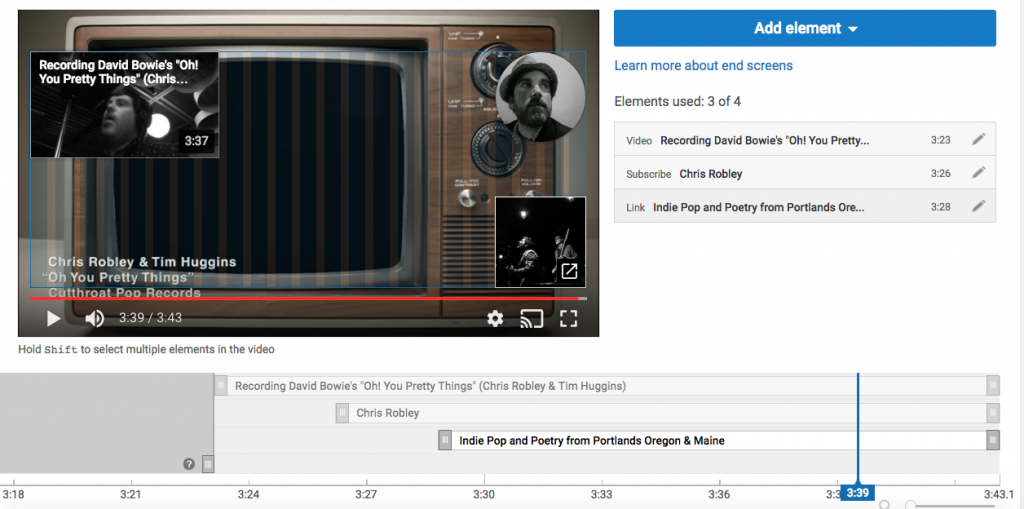
- Adjust the placement and size of each element on the grid. Adjust the time for the element to show in the timeline below.
- Click Save.
- ALSO, WATCH THE VIDEO BELOW TO SEE HOW TO ADD END SCREEN IN YOUTUBE VIDEOS
About KIRUBAKARAN
No comments