How to Add Custom Thumbnail To Your YouTube Videos
How to Add Custom Thumbnail To Your YouTube Videos
Your YouTube account doesn’t come with the ability to upload custom thumbnails by default. In order for your account to gain this ability, you need to first enable the custom thumbnail option.
Once enabled, the process of setting a custom thumbnail for a published video is straightforward and involves just a few clicks.
1. Log in to YouTube.
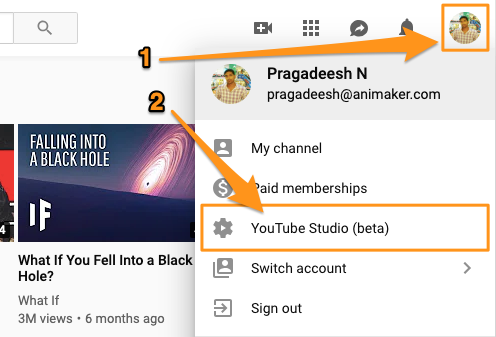
2. Click on your profile icon in the top right corner and select YouTube Studio(beta)’ from the dropdown menu.

3. Click on the ‘Videos’ tab on the left side of the page and then click on the title or thumbnail of the video for which you want to change the thumbnail.

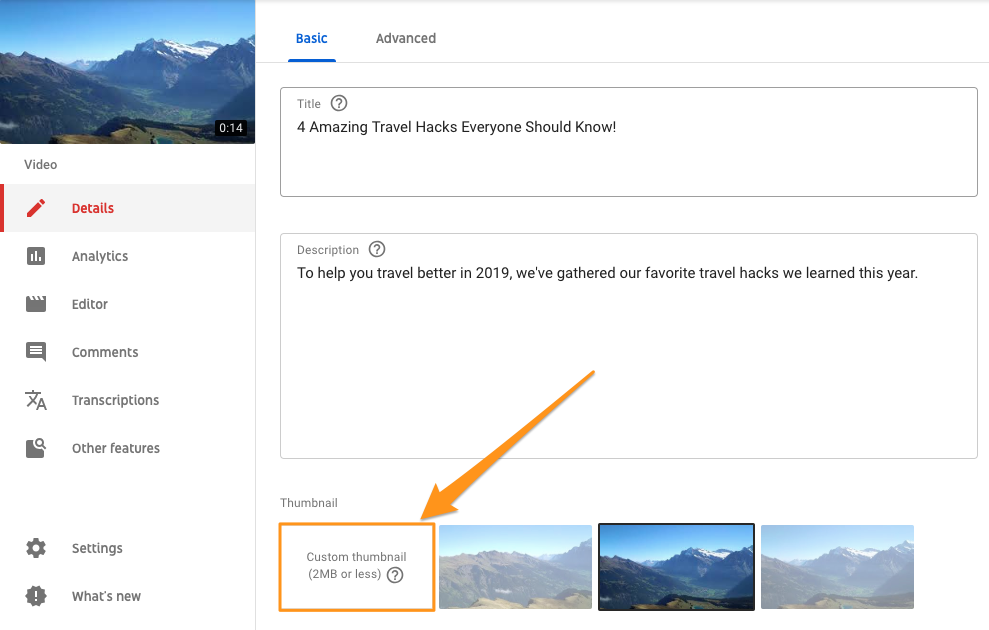
4. In the next screen that appears, under the ‘Basic’ tab, you’d see a section named ‘Thumbnail’. Under this section, you’d see three auto-generated thumbnail options and a button on the far left that says ‘Custom thumbnail’. Click on this button to upload your custom image.

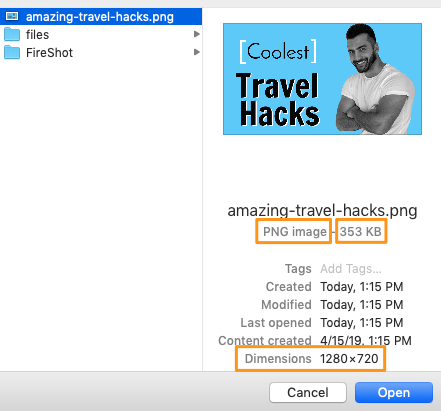
5. Now select the file you’d want to set as a thumbnail and click ‘Open’. Make sure that it adheres to all the technical recommendations. In the example below, the selected image has been optimized for the best YouTube thumbnail size, is under 2 MB, is in PNG format, and follows the 16:9 aspect ratio.

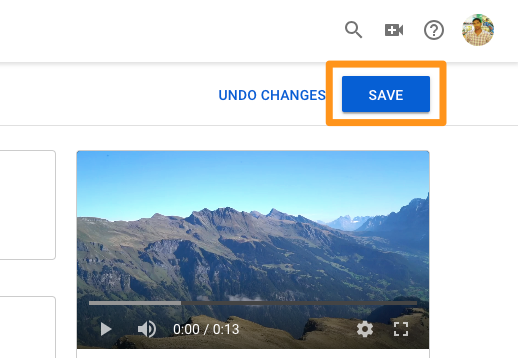
6. Finally, click on the ‘SAVE’ button in the top-right corner of the page. This will save the changes and apply the thumbnail to your video.


No comments